Have a look at:
www.dancover.co.uk/
for alternative shelters in different qualities.
No personal experience of 'dancovers' but certainly looks comparable.
Tireur
Playtime refit.
-
PerHansson
- Commander
- Posts: 311
- Joined: Thu Dec 17, 2009 3:27 pm
- Location: United Kingdom
- Contact:
-
Folly Reach
- Captain
- Posts: 426
- Joined: Thu Jul 15, 2010 1:03 pm
- Location: United Kingdom
Hi Per.
Hope you are well. The Dancover does look better quality and probably easier to erect, however the cost looks to be 3 or 4 times more expensive.
Have put framework up today (mad fools) just need to get the boat into it before finishing off the high stuff and fitting the cover.
Way to windy for that today. Not having the boat in the way made the whole process quicker I think than having to walk around the boat all the time.
Ian
-
PerHansson
- Commander
- Posts: 311
- Joined: Thu Dec 17, 2009 3:27 pm
- Location: United Kingdom
- Contact:
Ian,
You are quite right about the price difference, eventhough Dancover makes a powder coated frame at a reduced price, the difference is still twice the 'ebay price'!
If the local (Dartmouth area) hard standing winter rental was affordable I would probable take out Tireur over the toughest winter months. However, the next best thing, I hope, is to have a winter cover fitted which covers the whole boat and is strapped down, fore and aft and on the sides. I will take some photos when it is complete as it may be of interest to others. The cost is however more in the region of the Dancover tent and the guy is supposed to be inexpensive but very good, if not very fast, as the cover should have been completed before the new year!
'Hate to have to drill holes for the fastenings...but needs must, etc!
Per
Ps. Weather forecast looks better for mid-week, good luck!
-
Folly Reach
- Captain
- Posts: 426
- Joined: Thu Jul 15, 2010 1:03 pm
- Location: United Kingdom
Hi Per.
I had an overall cover for Venator, no fixings required it had a draw string and was in two parts, When it was on boat I worked about 3 underwater straps along from the bows using dinghy on the side away from the pontoon. Once these were secure I tightened up the draws strings at bow and stern and job done. This cover is now owned by another member after Venator sank and is still in use. Back in 1996 it cost about £650 obviously with inflation etc and your boat being longer and broader than a Huntsman 31 you would expect to pay a lot more now.
I hate paying exorbitant out of the water storage charges, fortunately Venatrix has a decent road trailer and I have found storage on a farm local to my home for the princely sum of £32 per calender month........... And they have agreed to my tent going up.
Should keep me out of mischief.
Ian
-
PerHansson
- Commander
- Posts: 311
- Joined: Thu Dec 17, 2009 3:27 pm
- Location: United Kingdom
- Contact:
Ian,
Here are some comparative results from the Dartmouth region. Six months winter storage ashore including lift out, blocking and re-launch, varies from £1133 (Noss Marina) to £2302 (Darthaven Marina), MDL (Dart Quay) is similar in price to Noss Marina. The cost would be approximately the same for three months storage as the monthly fee is higher.These costs are for 'visitors' who don't berth with the Marinas.
Hence, the cost of the overall cover of £2380 has become a must and justification in pampering my 'pride&joy'! (Having said that, I haven’t factored in the invaluable benefit of one’s own shed for tinkering, not to mention mischief!)
Thank you for the idea of using straps around the keel instead of fastenings, which practicality I will certainly look into.
Best wishes,
Per
-
Folly Reach
- Captain
- Posts: 426
- Joined: Thu Jul 15, 2010 1:03 pm
- Location: United Kingdom
-
Ben
- Admiral
- Posts: 1692
- Joined: Thu Mar 25, 2004 7:05 pm
- Location:
Long over due for a bit of an update.
I'm trying to get all the paint removal and bulk of the sanding and wood repairs done by the end of this month, then in April (except for a few days excursion with some club members getting lost in the Irish Sea) I can concentrate on paintwork, it'll be a bit warmer by then too.
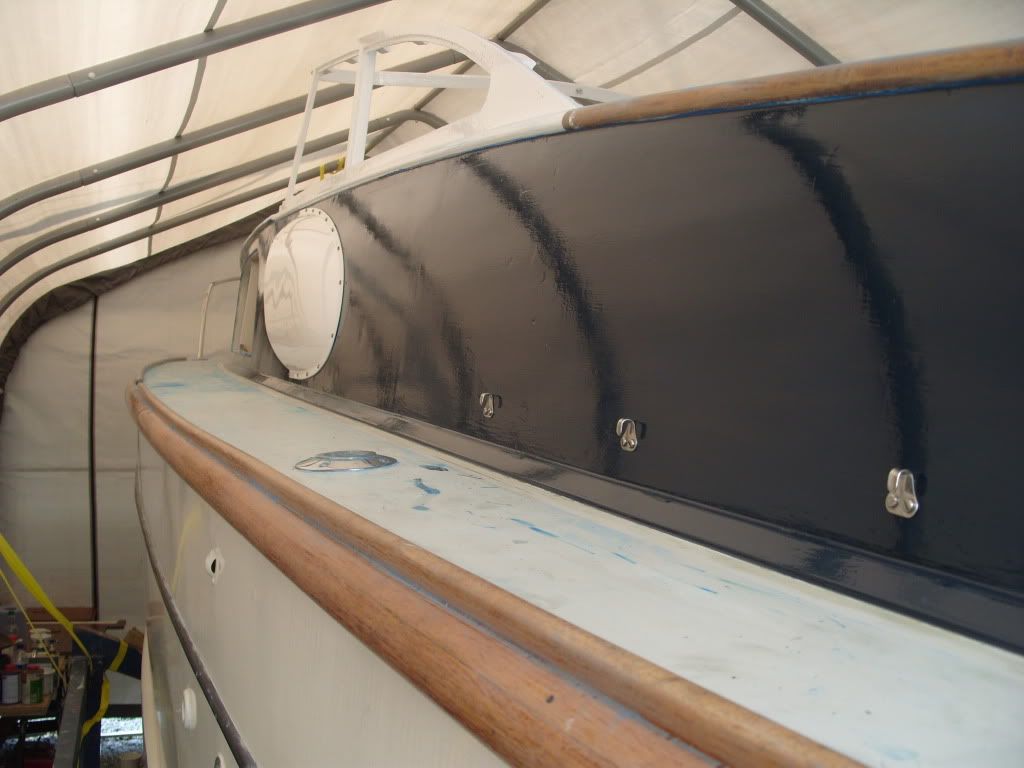
One side sanded and ready for epoxy primer.

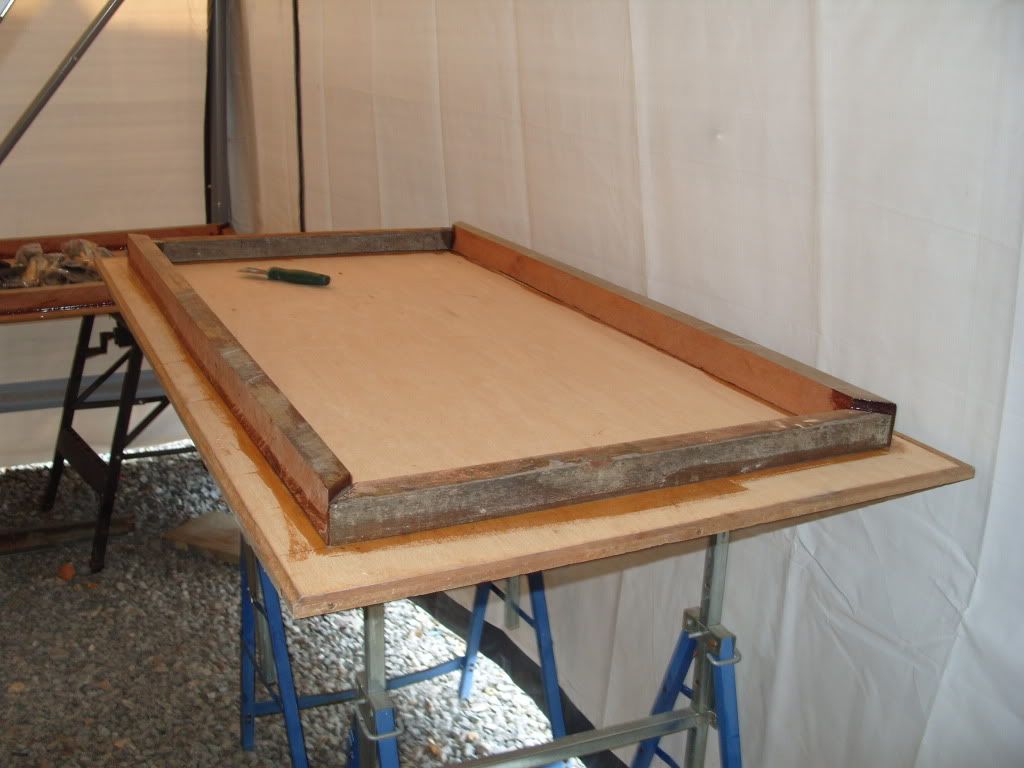
Beginings of one new engine hatch, they were a complete mess, heavy, scruffy, broken and annoying me for 8 years....the framework is a reclaimed mahogany staircase from a demolished school, its a hard material to work with but straight, stable and strong.
Home from home....
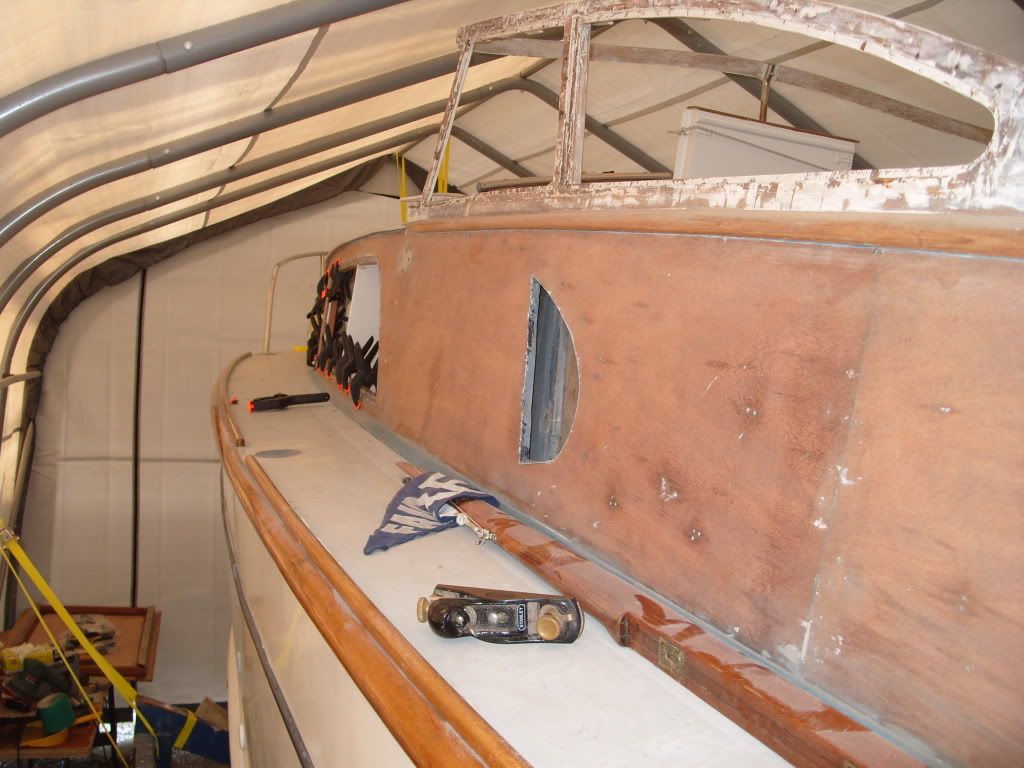
T'other side.
One margin board in place.
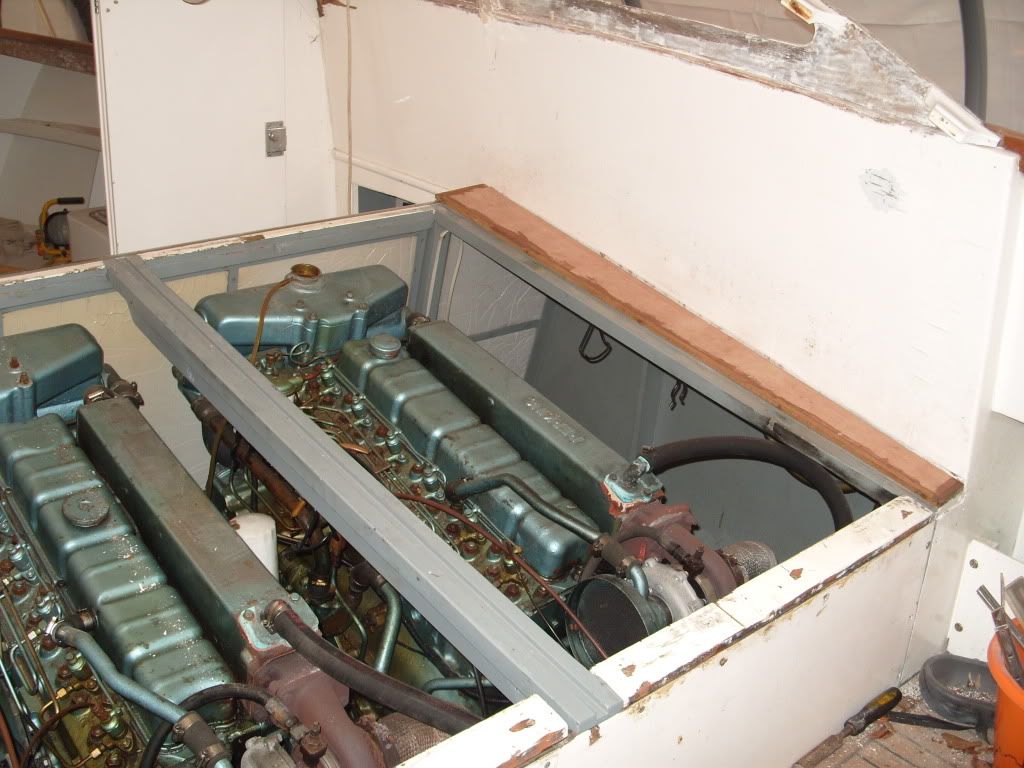
I bought some 8ft lengths of teak to cover the engine hatches, 11mm thick, 46mm wide, its not qtr sawn but it is £6 a length, a very good price and the chap has got more if anyone needs some.
I'm trying to get all the paint removal and bulk of the sanding and wood repairs done by the end of this month, then in April (except for a few days excursion with some club members getting lost in the Irish Sea) I can concentrate on paintwork, it'll be a bit warmer by then too.
One side sanded and ready for epoxy primer.
Beginings of one new engine hatch, they were a complete mess, heavy, scruffy, broken and annoying me for 8 years....the framework is a reclaimed mahogany staircase from a demolished school, its a hard material to work with but straight, stable and strong.
Home from home....
T'other side.
One margin board in place.
I bought some 8ft lengths of teak to cover the engine hatches, 11mm thick, 46mm wide, its not qtr sawn but it is £6 a length, a very good price and the chap has got more if anyone needs some.
-
Folly Reach
- Captain
- Posts: 426
- Joined: Thu Jul 15, 2010 1:03 pm
- Location: United Kingdom
Hi Ben
Are you epoxy sheathing the cabin sides, mine are all covered in cloth with West. BEST thing I ever did. Dark blue stays stable with no cracks.
If you are try Epo Seal 1st, it is an SP product thin as water it is a Epoxy but solvent based, absorbs into wood amazingly. You can almost hear it being sucked in.......
Regards
Ian
-
david timothy mark rhodes
- Midshipman
- Posts: 120
- Joined: Fri Aug 31, 2007 5:36 pm
- Location:
Hi Guys
Just to endorse what Ian said SP (now Gurit) do a product called eposeal its basically an epoxy with loads of solvent in, comes in 2 tins mix equally (make sure you have plenty of ventilation it has very strong fumes) then paint on, its got a similar consistency to cellulose thinners and soaks right in to the wood, you can overcoat almost immediately if you wish with another coat or two, it has to be warm (15 degrees) to cure properly but when it has you have a wood/epoxy composite finish which is great for further finishes.
On a 28 the cabin sides Ivan and I found it near impossble to stop the 2 pieces of ply from moving and then cracking the paint, till we sheathed it.... Job done
-
Ben
- Admiral
- Posts: 1692
- Joined: Thu Mar 25, 2004 7:05 pm
- Location:
We should really have a separate thread on epoxy.
That join on the cockpit coaming has been a thorn in my side, as you say, it cracks the paint and then of course water gets in. I have chiselled a V shaped groove down the face of the joint and epoxied it, I'll post a picture later, hopefully that should hold it firm.
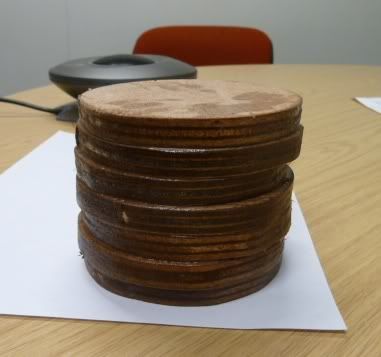
I had a very tidy aerial mount on the cabin roof with the cable hidden down the middle, it needs replacing, this stack of discs is off in the post to a very nice chap on the Isle of Man who is going to turn it into a nice tidy cone for me on his lathe.
That join on the cockpit coaming has been a thorn in my side, as you say, it cracks the paint and then of course water gets in. I have chiselled a V shaped groove down the face of the joint and epoxied it, I'll post a picture later, hopefully that should hold it firm.
I had a very tidy aerial mount on the cabin roof with the cable hidden down the middle, it needs replacing, this stack of discs is off in the post to a very nice chap on the Isle of Man who is going to turn it into a nice tidy cone for me on his lathe.
-
Ben
- Admiral
- Posts: 1692
- Joined: Thu Mar 25, 2004 7:05 pm
- Location:
Its lovely having the FOC, we get this forum to share our exploits, we get a fantastic magazine, some great fun rallies, but more than that, we get to meet some lovely folk and make good friends, sometimes, we call on those friends to help us out, fresh from the Isle of Man's best wood turner.
My new aerial mount.
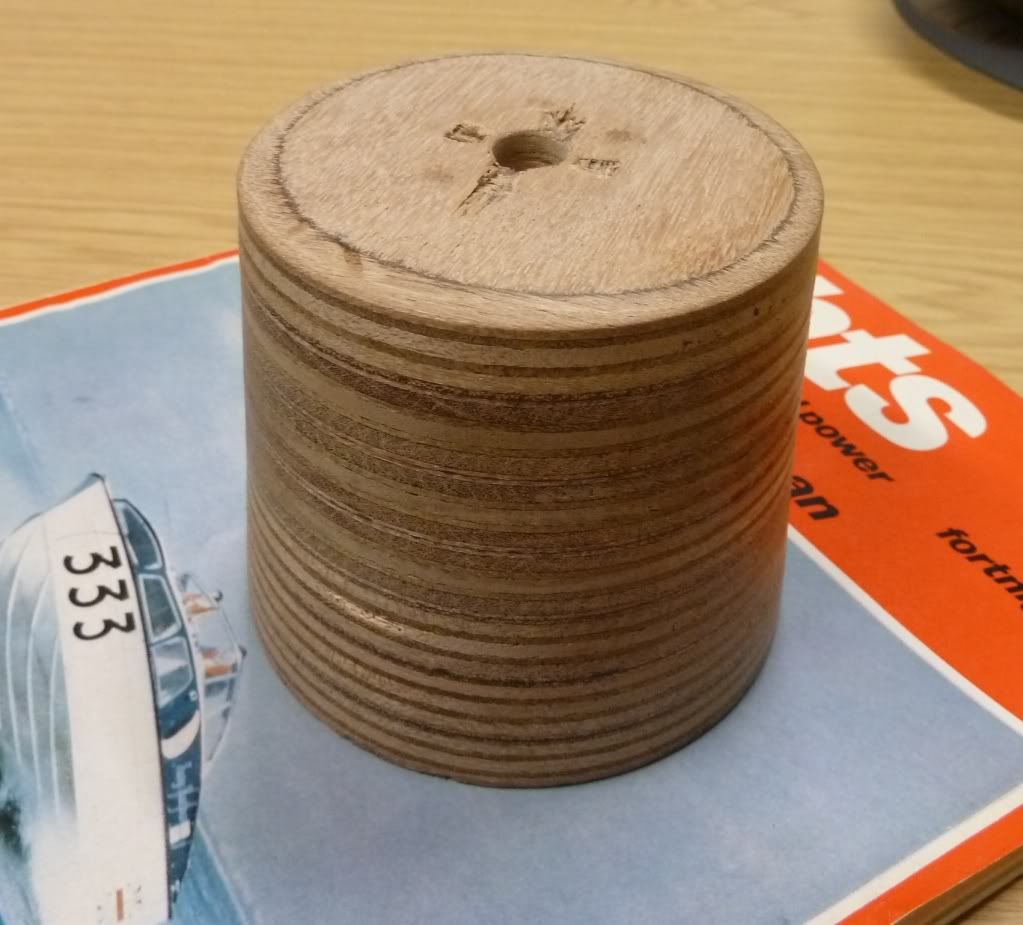
(Pretty cool background to the picture!)
My new aerial mount.
(Pretty cool background to the picture!)
-
Ben
- Admiral
- Posts: 1692
- Joined: Thu Mar 25, 2004 7:05 pm
- Location:
Update overdue as we had mislaid the digital camera.
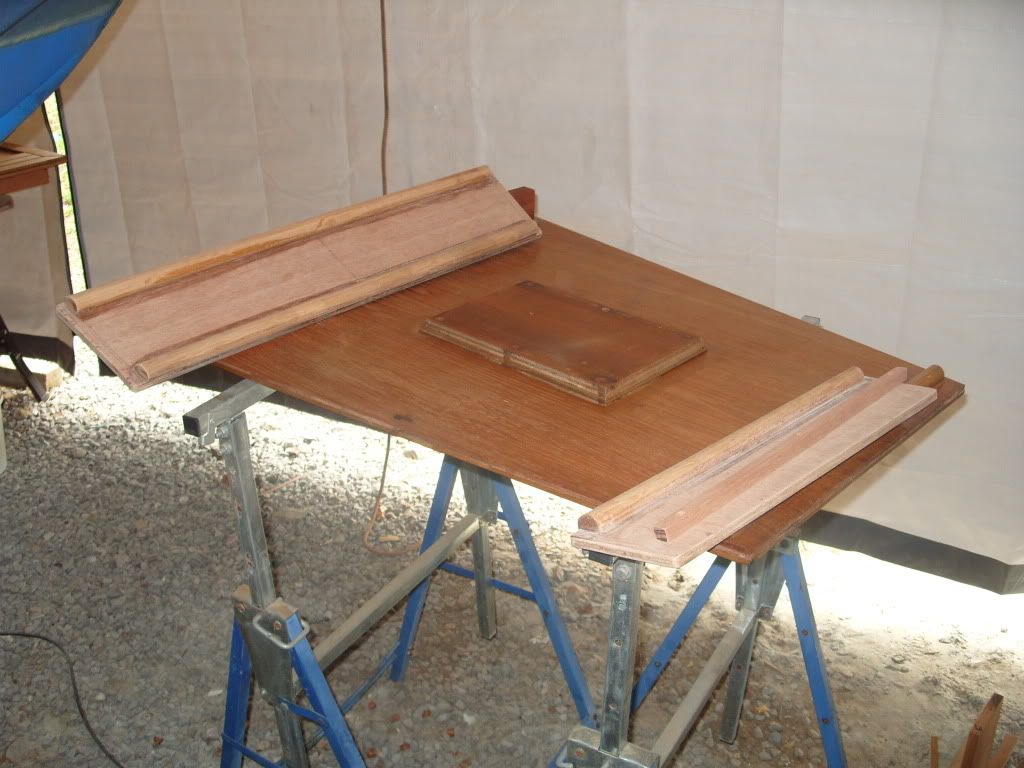
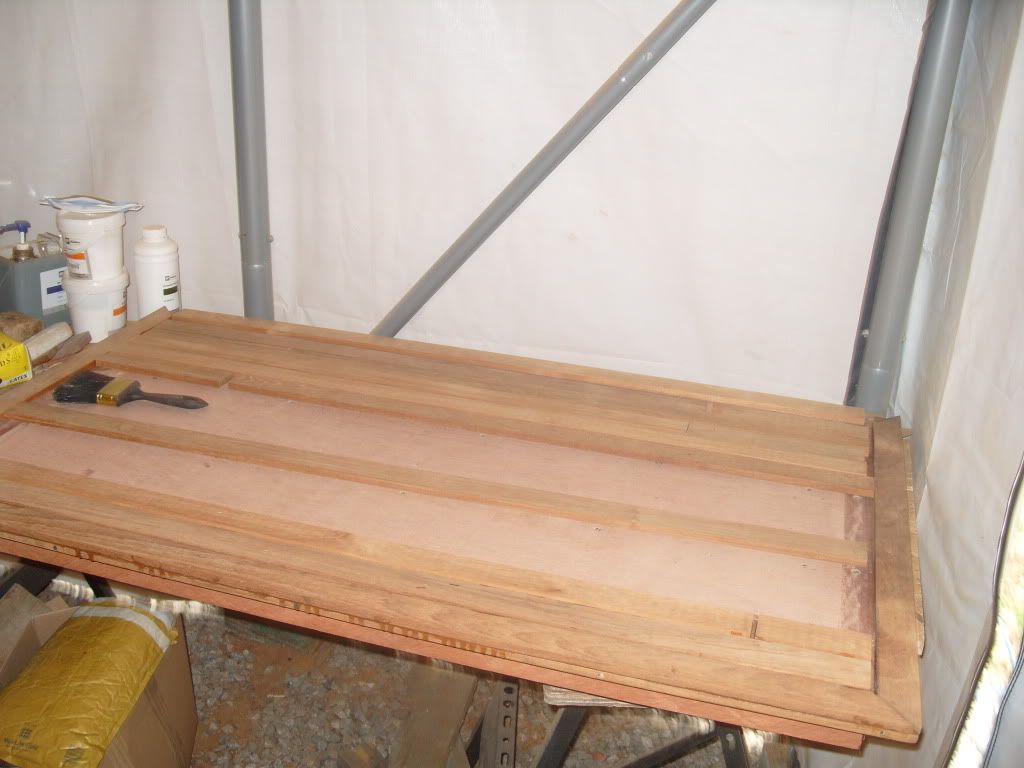
Repaired table and new infill pieces to extend the bed.
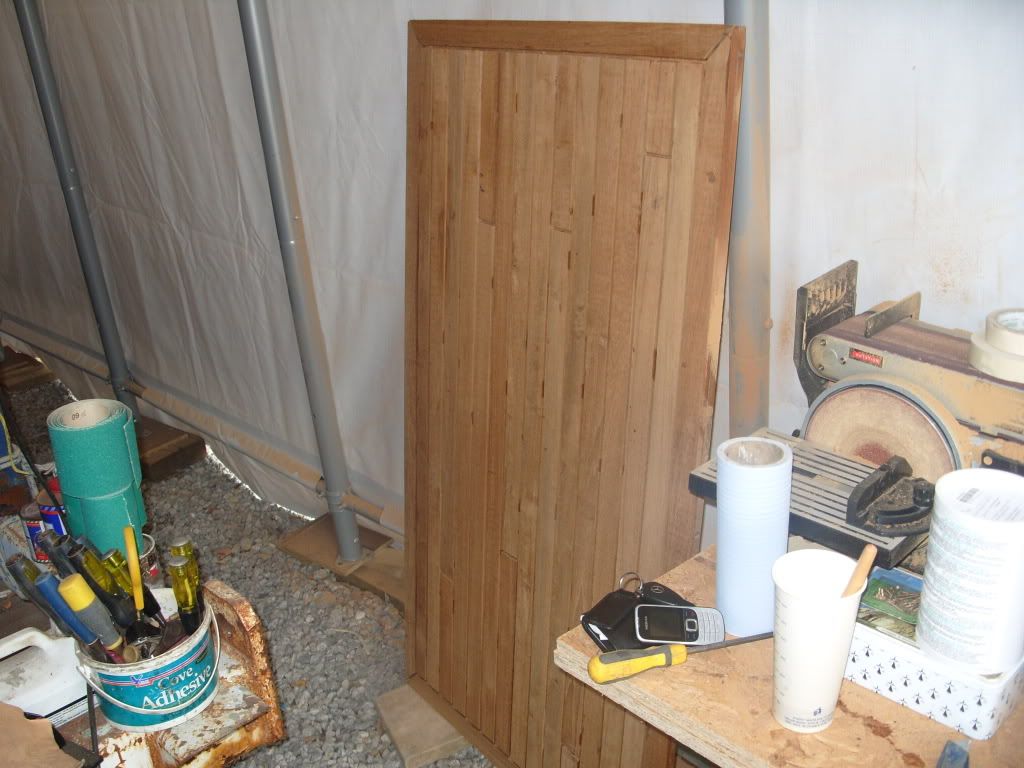
Second engine hatch underway.
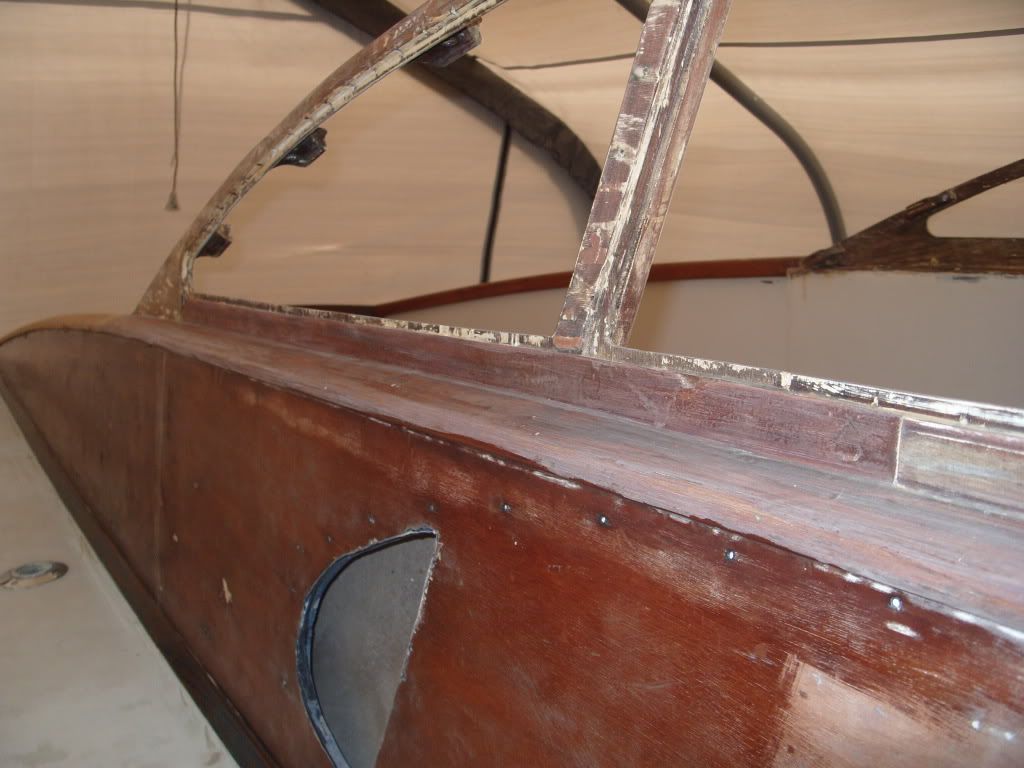
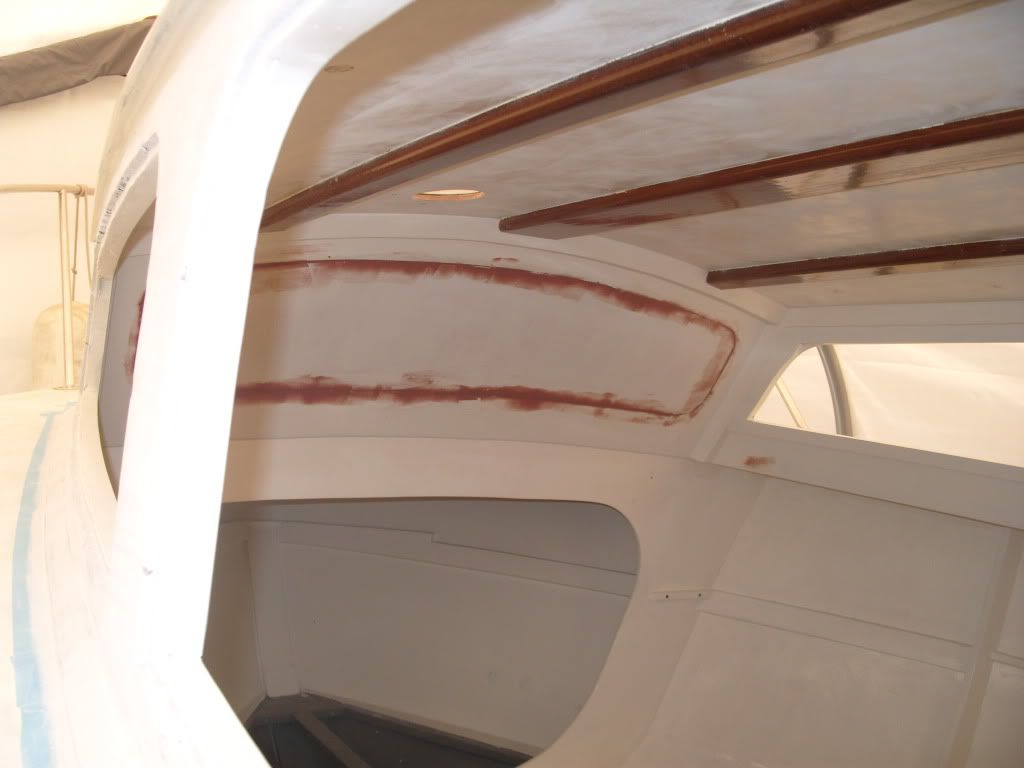
Graving piece in the windscreen frame.
Epoxy coated cockpit coaming.

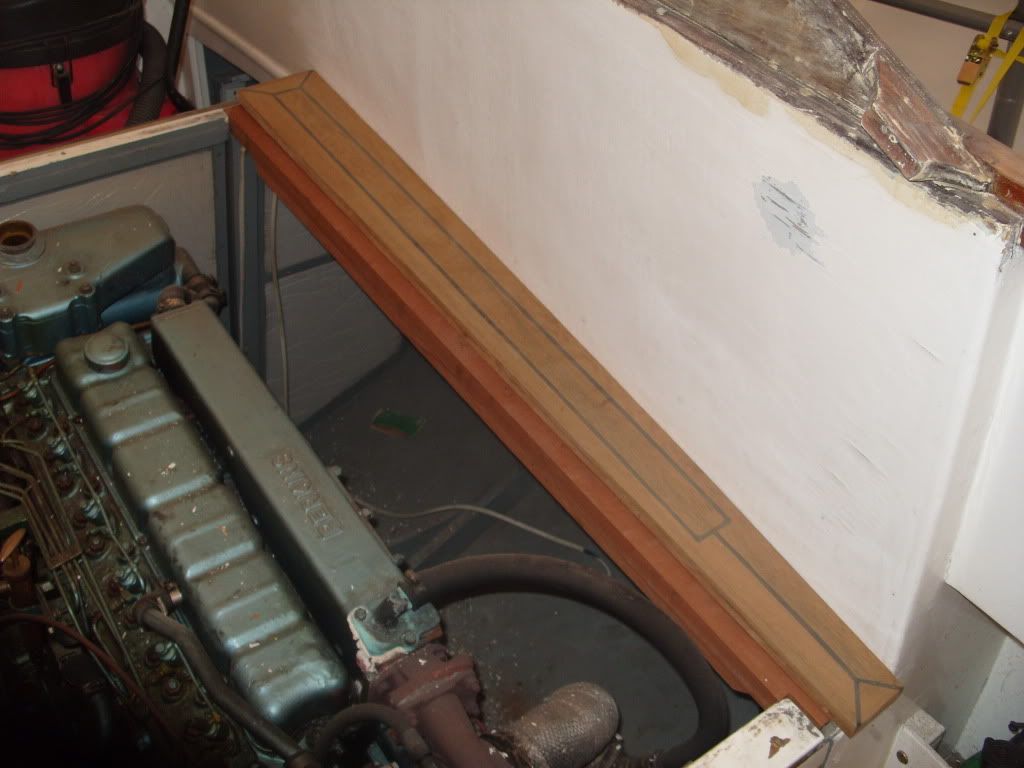
Margin board and supporting timber, strengthened underneath.
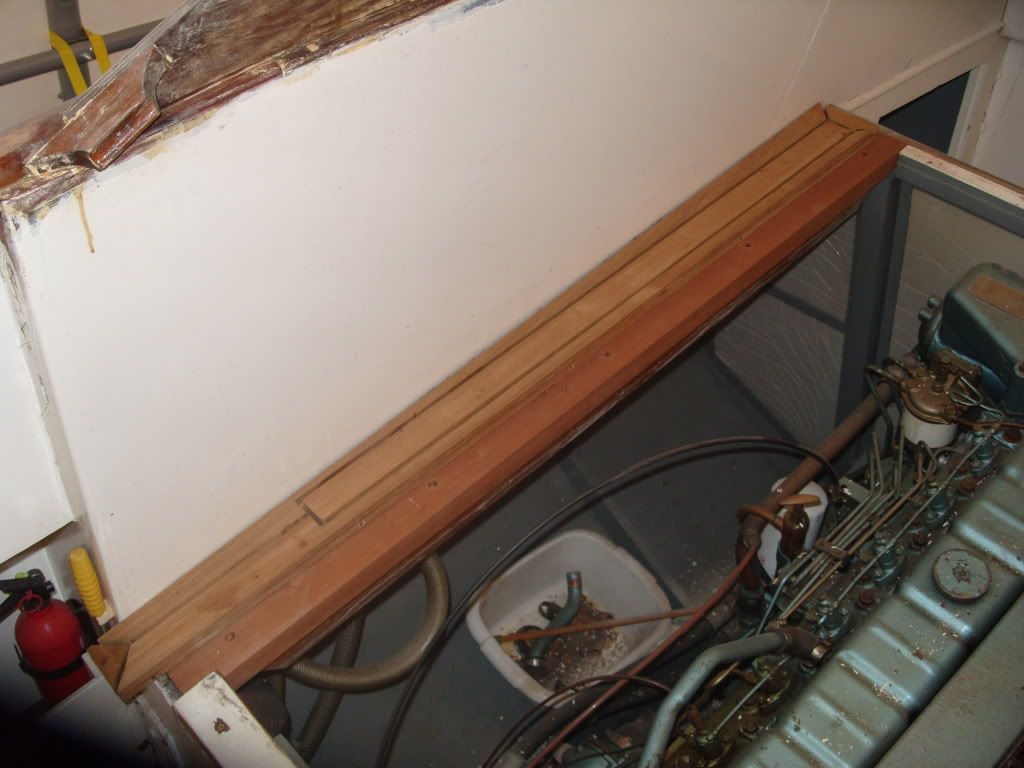
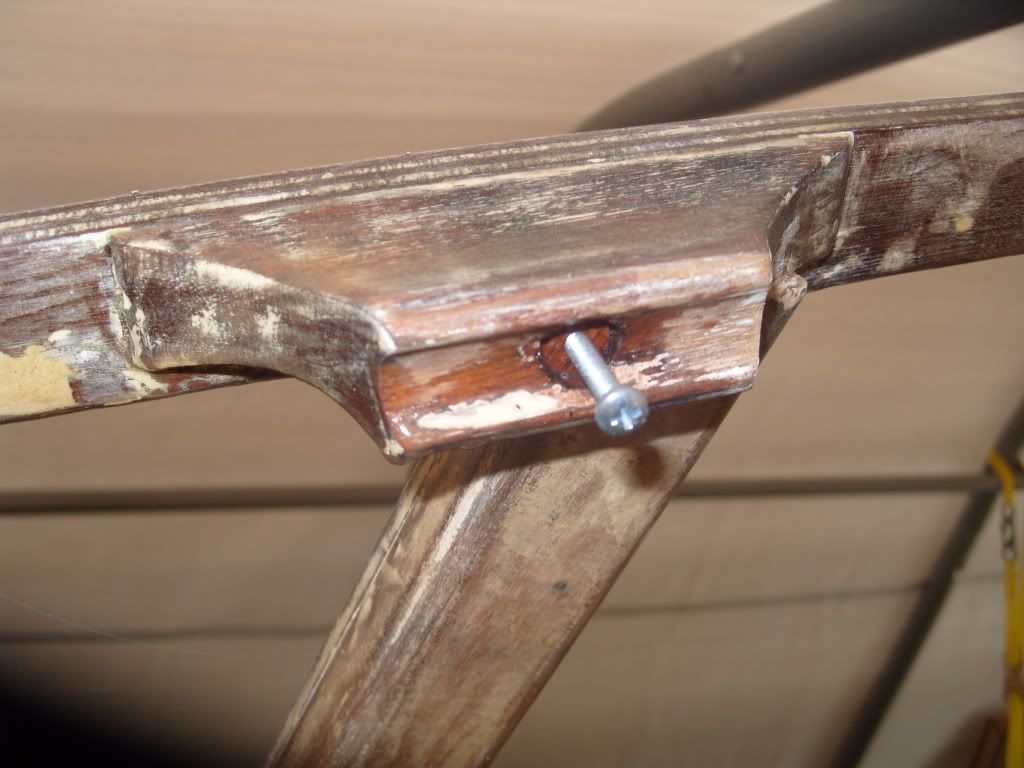
Same on the other side.
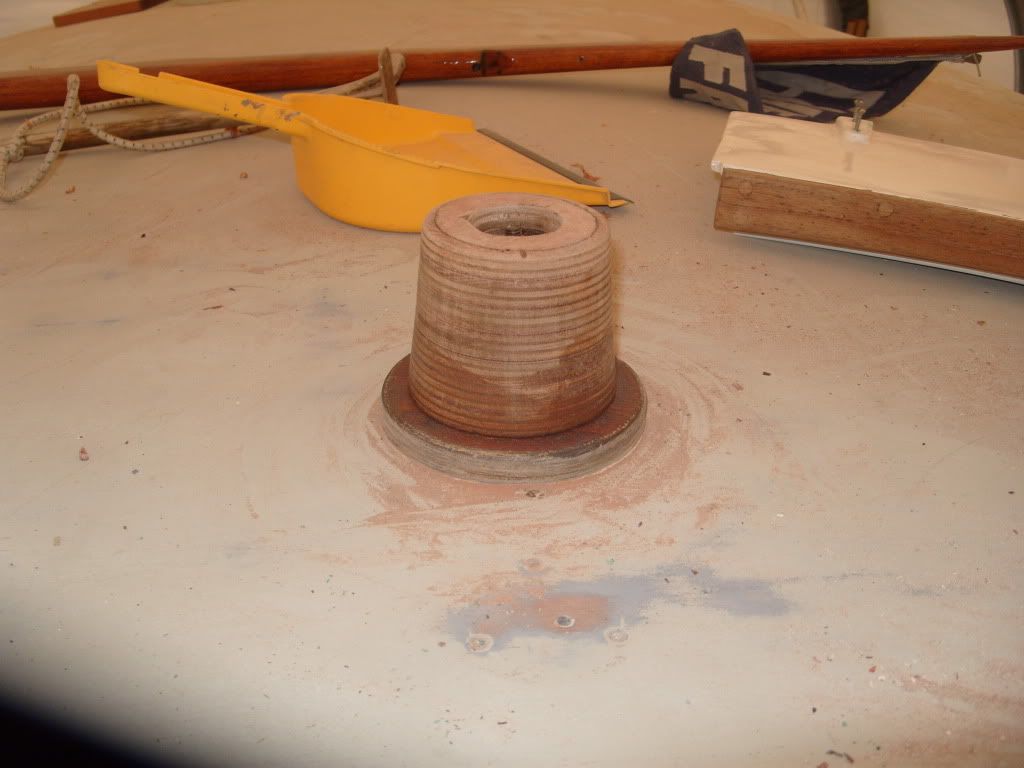
Screw hole was run out, drilled to half inch and a 12mm plug epoxied in, pilot screw to aid handling and keep fingers clean!
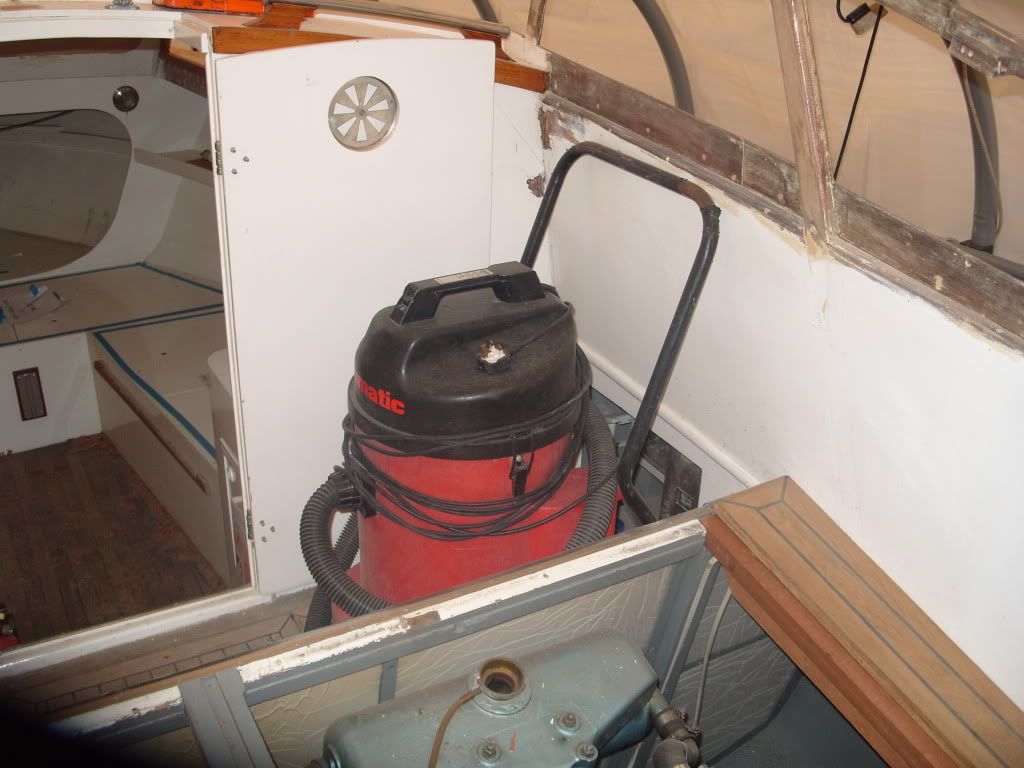
Acquired DIY Hoover from work, bit big really, wont go in the cabin!
Aerial mount Felix made for me (Thanks F!)
Second engine hatch.
Repaired table and new infill pieces to extend the bed.
Second engine hatch underway.
Graving piece in the windscreen frame.
Epoxy coated cockpit coaming.
Margin board and supporting timber, strengthened underneath.
Same on the other side.
Screw hole was run out, drilled to half inch and a 12mm plug epoxied in, pilot screw to aid handling and keep fingers clean!
Acquired DIY Hoover from work, bit big really, wont go in the cabin!
Aerial mount Felix made for me (Thanks F!)
Second engine hatch.
-
Folly Reach
- Captain
- Posts: 426
- Joined: Thu Jul 15, 2010 1:03 pm
- Location: United Kingdom
-
Ben
- Admiral
- Posts: 1692
- Joined: Thu Mar 25, 2004 7:05 pm
- Location:
I've been working flat out, one of two hiccups but progress is generally good.
Cabin roof with one coat of deck paint. I've just done the second coat, looks good. Probably look dreadful in the sunshine!
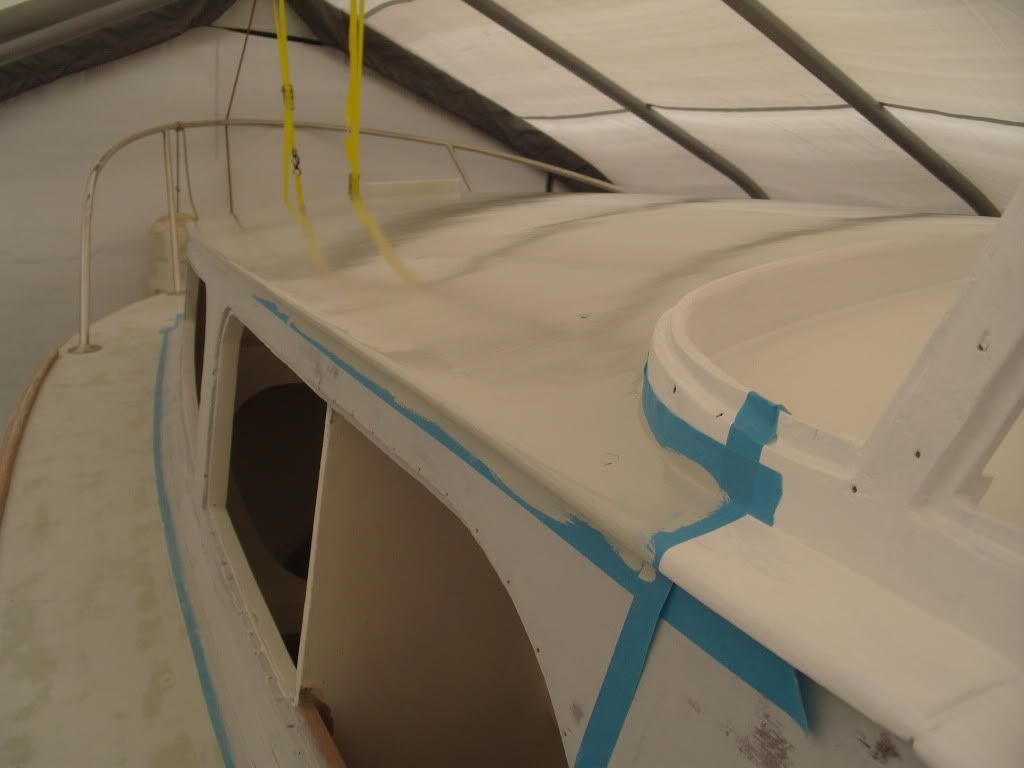
Windscreen frame in its final top coat, Epifanes two pack white, this is the aforementioned hiccup, a paint reaction, looks a bit rough but will have to do for this year.
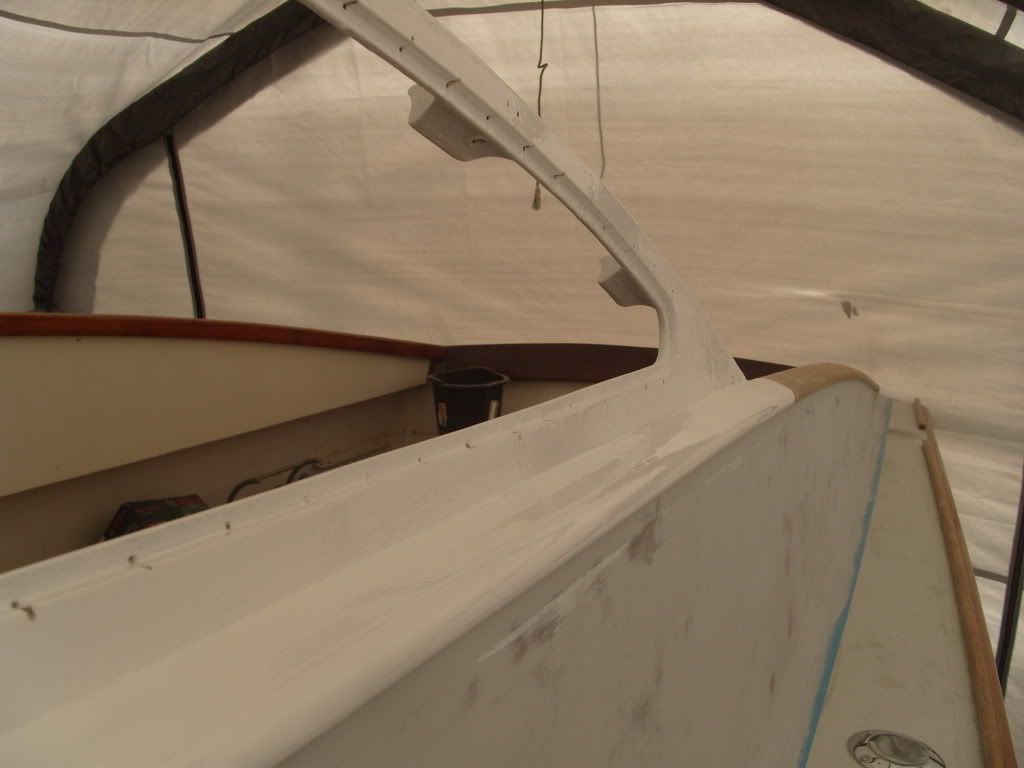
Cabin sides, two coats SP 106 epoxy, one coat Nautix HPE high build epoxy primer, dark blue two pack undercoat going on tomorrow.
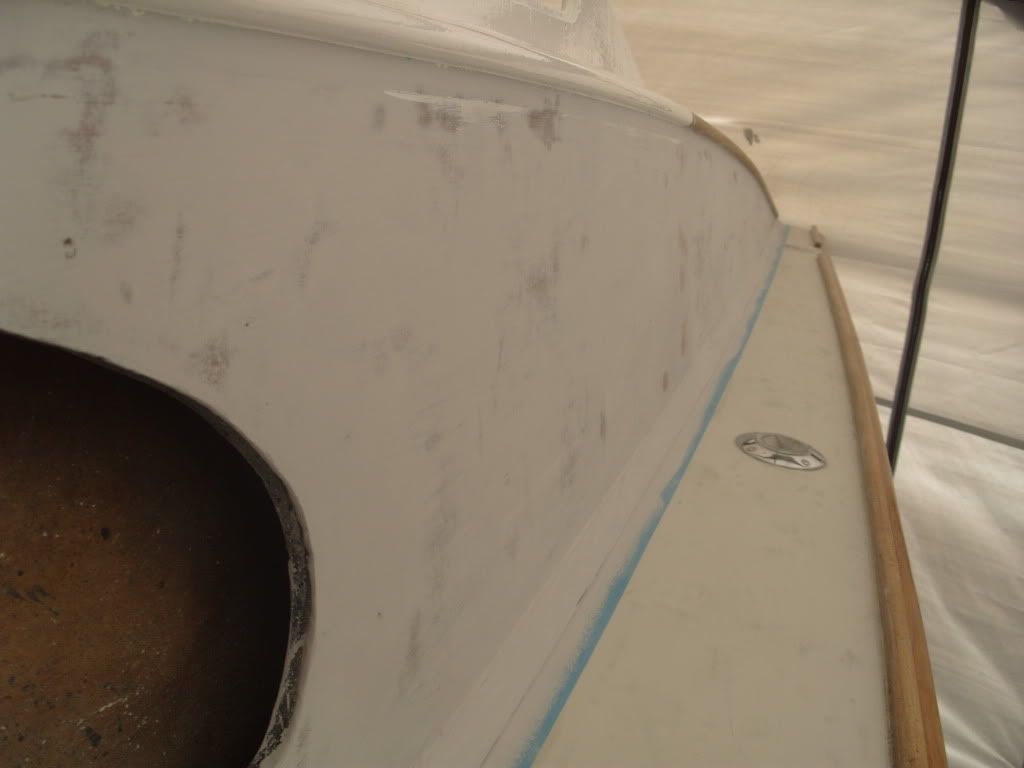
I now have a 20% reduction in possible cabin window leaks! The front one, due to its angle and movement in the boat up front is more prone to leaking at the bottom corners. Not any more!
Bit of undercoating and top coat inside, I've stuck with traditional single pack paint inside, the International Pre-kote has a proper boatyard smell. Mmmm.

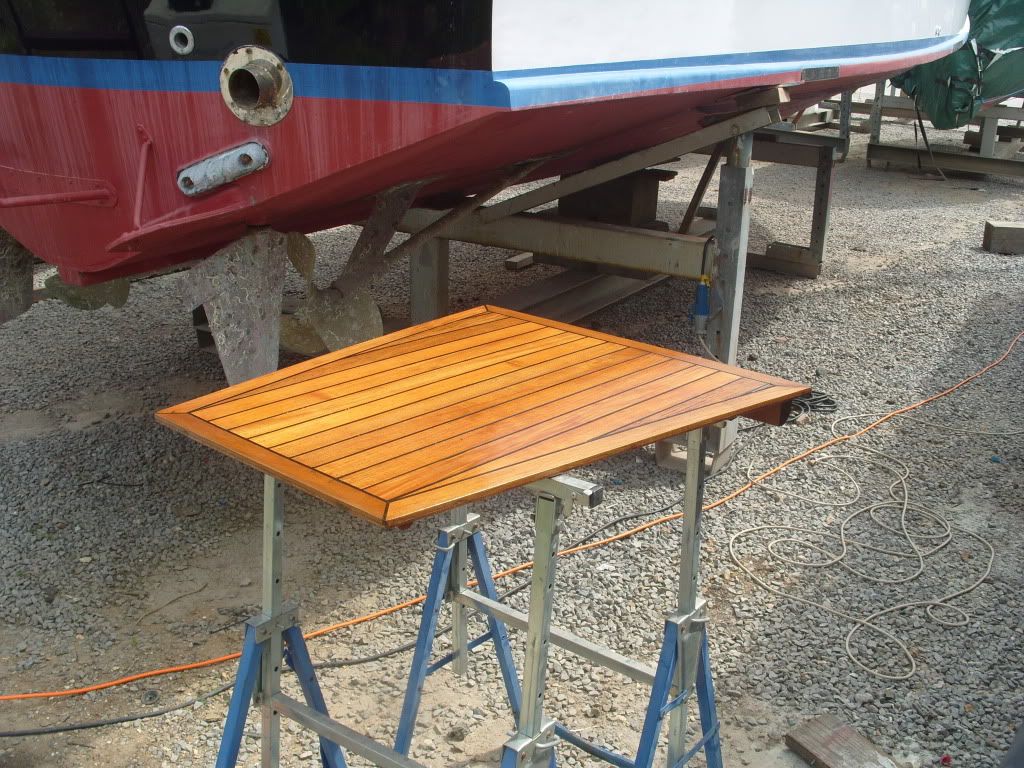
Cabin table and bunk infill, tidied up, fiddles removed to make a flatter bed, varnished with Epifanes, when you study Yachtmaster theory they teach you all about clouds, they dont mention the most prolific cloud of all, the boatyard dust could. Humph.
Cabin roof with one coat of deck paint. I've just done the second coat, looks good. Probably look dreadful in the sunshine!
Windscreen frame in its final top coat, Epifanes two pack white, this is the aforementioned hiccup, a paint reaction, looks a bit rough but will have to do for this year.
Cabin sides, two coats SP 106 epoxy, one coat Nautix HPE high build epoxy primer, dark blue two pack undercoat going on tomorrow.
I now have a 20% reduction in possible cabin window leaks! The front one, due to its angle and movement in the boat up front is more prone to leaking at the bottom corners. Not any more!
Bit of undercoating and top coat inside, I've stuck with traditional single pack paint inside, the International Pre-kote has a proper boatyard smell. Mmmm.
Cabin table and bunk infill, tidied up, fiddles removed to make a flatter bed, varnished with Epifanes, when you study Yachtmaster theory they teach you all about clouds, they dont mention the most prolific cloud of all, the boatyard dust could. Humph.